


궁금한 내용, 오타, 수정사항, 문의사항은 아래 깃허브 이슈 혹은 노션 블록 댓글로 달아주시면 바로 확인해드립니다! 도움이 되셨다면 아래 링크를 통해 한번 꾹 눌러주세요
한번 꾹 눌러주세요 7. 오브젝트
이번 장에서는 여러가지 오브젝트(도형)들을 하나의 오브젝트로 다루기 위해 object라는 리스트를 만드려고 한다.
7.1. 실습목표
object 리스트에 대해 알아보고 리스트를 만든다. 이 전에 만든 함수들을 object 리스트에 맞게 수정한다.
7.2. object
6단원까지는 sphere 하나의 object를 구현하고 저장하였지만 앞으로 여러가지의 object를 추가할 수 있게 하기 위해서 코드의 수정이 필요하다. 우선 여러가지의 object를 저장할 수 있어야하고 그 object들을 한번에 가지고 다닐 수 있어야한다. ray는 여러개의 object 중 가장 가까이에 있는 object에 히트를 해야한다.
우리는 object라는 리스트를 만들어 각 도형의 정보를 저장할 것이다. 그리고 기존에 sphere에만 적용 가능했던 함수들을 조금씩 손봐줄 예정이다.
먼저 다음과 같은 구조체를 만들어서 structures.h에 추가해주자.
...
// 3. 오브젝트 구조체
// 추가
typedef struct s_object t_object;
// 추가 끝
typedef struct s_sphere t_sphere;
...
# define FALSE 0
# define TRUE 1
// 추가
typedef int t_object_type;
# define SP 0
// 추가 끝
...
// 오브젝트 구조체
// 추가
struct s_object
{
t_object_type type;
void *element;
void *next;
};
// 추가 끝
#endif
C
복사
Code1 : [miniRT/include/structures.h]
Object 리스트 안에 type은 object 리스트를 봤을 때 현재 리스트가 가리키는 도형이 무엇인지 바로 알 수 있기 위해 추가하였다. 그리고 우리는 sphere라는 도형은 매크로 SP로 type을 지정했다. 리스트의 element에 각 도형의 데이터를 저장할 것이다.
7.3. object 적용
object 리스트를 구현했으니 hit함수를 추가하여 object를 받을 수 있게 하자. 그리고 ray_color와 hit_sphere도 t_sphere에만 한정되지 않는 함수로 바꾸어 주자.
t_point3 ray_at(t_ray *ray, double t);
// 추가
t_color3 ray_color(t_ray *ray, t_object *world); // 수정.
// trace/hit/
t_bool hit(t_object *obj, t_ray *ray, t_hit_record *rec);
t_bool hit_obj(t_object *obj, t_ray *ray, t_hit_record *rec);
t_bool hit_sphere(t_object *world, t_ray *ray, t_hit_record *rec);
// 추가 끝
...
C
복사
Code2 : [miniRT/include/trace.h]
// 추가
#include "trace.h"
t_bool hit(t_object *world, t_ray *ray, t_hit_record *rec)
{
t_bool hit_anything;
t_hit_record temp_rec;
temp_rec = *rec; // temp_rec의 tmin, tmax 값 초기화를 위해.
hit_anything = FALSE;
while(world)
{
if (hit_obj(world, ray, &temp_rec))
{
hit_anything = TRUE;
temp_rec.tmax = temp_rec.t;
*rec = temp_rec;
}
world = world->next;
}
return (hit_anything);
}
// hit_obj는 오브젝트 타입에 맞는 hit함수로 연결해주는 관문
t_bool hit_obj(t_object *world, t_ray *ray, t_hit_record *rec)
{
t_bool hit_result;
hit_result = FALSE;
if (world->type == SP)
hit_result = hit_sphere(world, ray, rec); //hit_sphere의 첫번째 인자도 t_sphere *에서 t_object *로 수정해주자.
return (hit_result);
}
// 추가 끝
C
복사
Code3 : [miniRT/src/trace/hit/hit.c]
각 object를 순회하며 ray를 맞았는지 확인하기 위하여 hit라는 함수를 만들어 준다. 우리는 여러가지 오브젝트가 존재할 때에 더 가까이 있는 오브젝트를 히트해야한다. 그러므로 어떠한 오브젝트에 히트하면 tmax를 히트한 t로 바꾸어 그 다음 오브젝트를 검사할 때에 더 멀리 있는 오브젝트일 경우 히트가 안되게 했다.
hit_obj에서는 리스트에 어떤 object가 저장되어 있는지 확인한 후 각각의 object에 맞는 함수를 실행할 수 있게 분기해주었다.
각 sphere와 object를 초기화 할 수 있는 함수를 만들어 보자.
// 제거
#include "structures.h"
t_sphere sphere(t_point3 center, double radius)
{
t_sphere sp;
sp.center = center;
sp.radius = radius;
sp.radius2 = radius * radius;
return (sp);
}
// 제거 끝
// 추가
#include "scene.h"
t_object *object(t_object_type type, void *element)
{
t_object *new;
if (!(new = (t_object *)malloc(sizeof(t_object))))
return (NULL);
new->type = type;
new->element = element;
new->next = NULL;
return (new);
}
t_sphere *sphere(t_point3 center, double radius)
{
t_sphere *sp;
if(!(sp = (t_sphere *)malloc(sizeof(t_sphere))))
return (NULL);
sp->center = center;
sp->radius = radius;
sp->radius2 = radius * radius;
return (sp);
}
// 추가 끝
C
복사
Code4: [miniRT/src/scene/object_create.c]
object함수는 리스트에 추가할 object를 만드는 생성자이다. 그리고 sphere는 sphere의 데이터를 저장하는 함수이다. sphere함수로 만든 구조체가 object의 element에 들어가는 것이다. object함수와 sphere함수 모두 장면을 구성하는 함수이므로 scene.h 파일에 추가해주자.
...
// 추가
t_object *object(t_object_type type, void *element);
// 추가 끝
t_sphere *sphere(t_point3 center, double radius);
C
복사
Code5: [miniRT/include/scene.h]
이제 object함수로 만든 오브젝트들을 오브젝트 리스트에 추가할 함수들을 만들어주자.
#include "utils.h"
void oadd(t_object **list, t_object *new)
{
t_object *cur;
if (*list == NULL)
{
*list = new;
return ;
}
cur = *list;
while (cur->next)
cur = cur->next;
cur->next = new;
}
t_object *olast(t_object *list)
{
if (list == NULL)
return (NULL);
while (list->next)
list = list->next;
return (list);
}
C
복사
Code6: [miniRT/src/utils/object_utils.c]
각각 리스트 추가, 리스트의 마지막으로 이동하는 함수들이다. 위 함수들을 utils.h에 추가해주자.
...
// 추가
// 오브젝트 유틸리티
void oadd(t_object **list, t_object *new);
t_object *olast(t_object *list);
// 추가 끝
#endif
C
복사
Code7: [miniRT/include/utils.h]
t_sphere를 바로 사용하던 ray_color를 수정해주자.
//광선이 최종적으로 얻게된 픽셀의 색상 값을 리턴.
// 수정
t_color3 ray_color(t_ray *ray, t_object *world)
// 수정 끝
{
double t;
t_vec3 n;
...
rec.tmin = 0;
rec.tmax = INFINITY;
//광선이 구에 적중하면(광선과 구가 교점이 있고, 교점이 카메라 앞쪽이라면!)
// 수정
if (hit(world, ray, &rec))
// 수정 끝
return (vmult(vplus(rec.normal, color3(1, 1, 1)), 0.5));
C
복사
Code8: [miniRT/src/trace/ray/ray.c]
sphere구조체를 받던 함수를 object를 받게 바꾸었다.
바뀐 구조를 적용하여 main을 수정해보자.
t_canvas canv;
t_camera cam;
t_ray ray;
// 제거
t_sphere sp;
// 제거 끝
// 추가
t_object *world;
// 추가 끝
//Scene setting;
canv = canvas(400, 300);
cam = camera(&canv, point3(0, 0, 0));
// 제거
sp = sphere(point3(0, 0, -5), 2);
// 제거 끝
// 추가
world = object(SP, sphere(point3(-2, 0, -5), 2)); // world 에 구1 추가
oadd(&world, object(SP, sphere(point3(2, 0, -5), 2))); // world 에 구2 추가
oadd(&world, object(SP, sphere(point3(0, -1000, 0), 990))); // world 에 구3 추가
// 추가 끝
// 랜더링
...
//ray from camera origin to pixel
ray = ray_primary(&cam, u, v);
// 제거
pixel_color = ray_color(&ray, &sp);
// 제거 끝
// 추가
pixel_color = ray_color(&ray, world);
// 추가 끝
write_color(pixel_color);
C
복사
Code9: [miniRT/src/main.c]
기존 sphere를 추가하는 부분에서 object를 추가하고 그 곳에 sphere를 추가하는 코드로 변경했다.
지금까지 코드를 수정한 결과는 다음과 같다(이미지1).
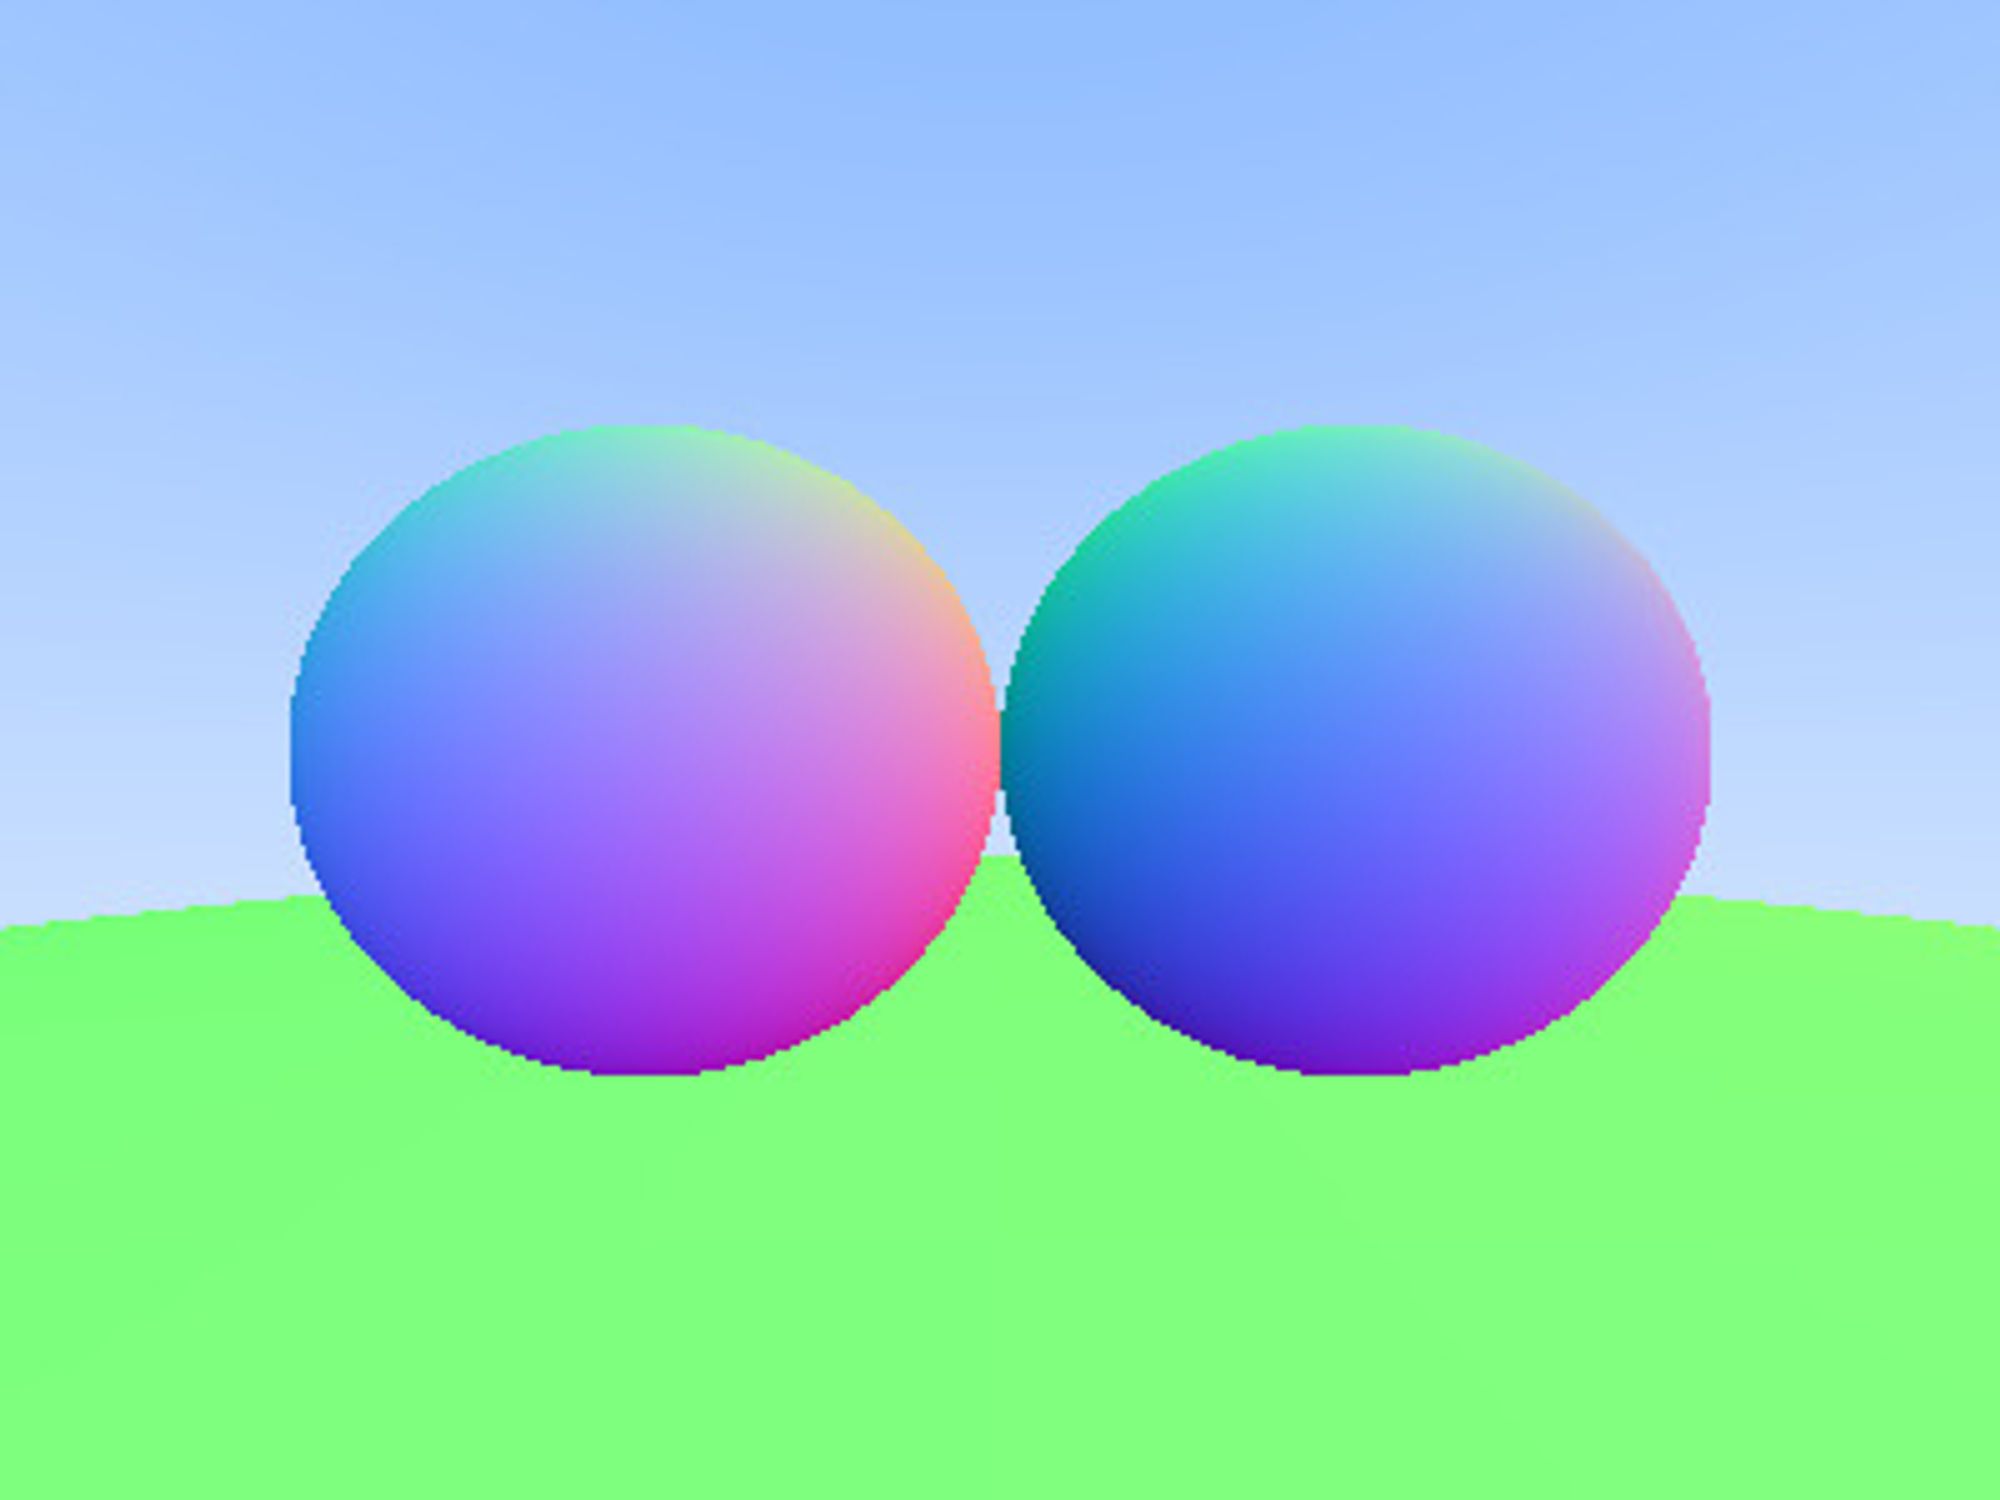
이미지1

