

mo.js는 많은 사람들에게 사랑받고 있는 애니메이션 라이브러리 중 하나이다. 이전에 anime.js를 사용해보면서 다른 라이브러리들도 궁금해져서 이번에 mo.js를 사용해보기로 했다.
메인페이지에서 부터 화려한 애니메이션을 뽑낸다.. 저걸 어떻게 만든거지…
아래는 usecase 가장 마지막에 나오는 예시 중 하나이다! 과연 공부를 다 하고나면 이렇게 만들 수 있을지.. 한번 배워보도록 하자!
Getting started
npm, yarn을 통해 받거나 cdn version을 활용할 수 있다.
•
npm, yarn
npm i @mojs/core
yarn add @mojs/core
Shell
복사
import mojs from '@mojs/core'
Shell
복사
•
cdn
<script src="https://cdn.jsdelivr.net/npm/@mojs/core"></script>
JavaScript
복사
API
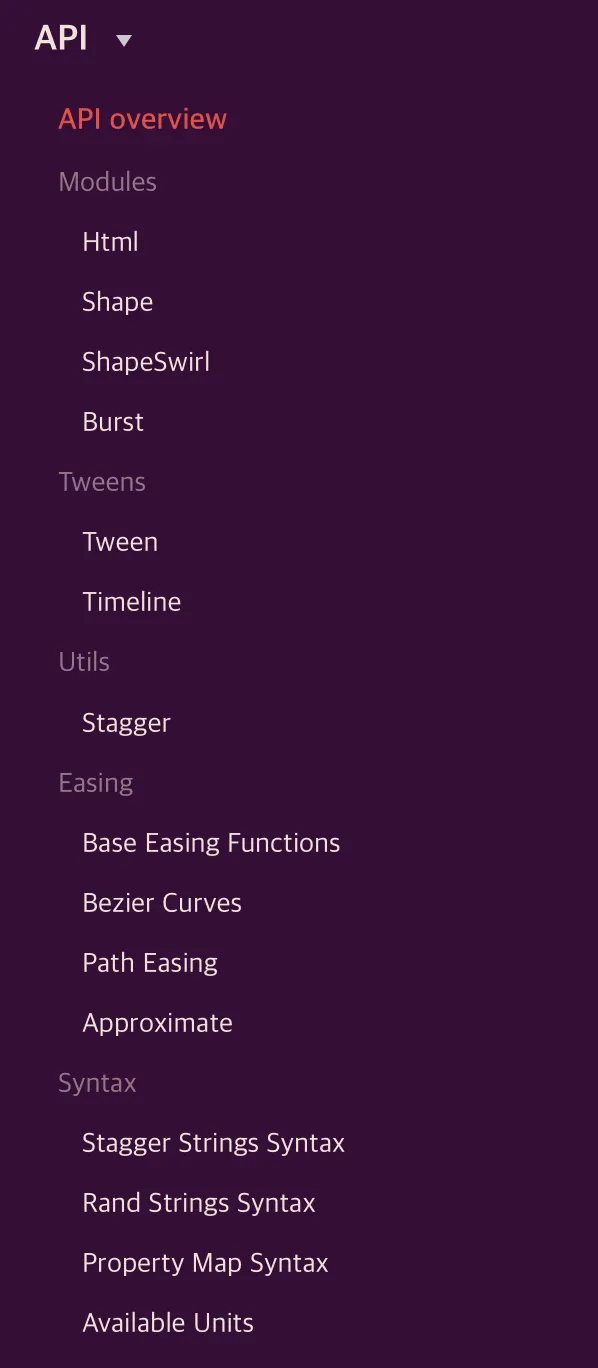
우선 mo.js가 어떤 API들을 제공하는지부터 살펴보자! 상당히 많은 API들을 제공하고 있는데, 들어가기 전 살펴봐야할 API는 Modules 부분이다.
각 모듈을 간단히 설명하면 아래와 같다.
•
Html - 만들어진 html element를 선택해서 적용
•
Shape - 특정 모양을 지정한 parent element에 추가
•
ShapeSwirl - shape기반, x/y 움직임을 사인함수 형태로 계산해줌
•
Burst - 아래에서 따로 설명
추가로 Tweens와 Easing은 필요에 따라 하나씩 찾아보면서 적용하면 큰 문제없이 진행할 수 있다.
Modules - Shape
아래 나오는 모든 프로퍼티, 콜백에 대해 설명하지는 않겠다! 하지만 mo.js에서 제공하는 대부분의 기능은 아래 형태만 이해해도 모두 구현할 수 있다. 전체적인 구조를 알아두면 좋기 때문에 prototype 전체를 가져와 보았다.
properties는 이름과 설명을 보면 각각 어떤 역할을 하는지 쉽게 파악할 수 있다.
const shape = new mojs.Shape({
/* SHAPE PROPERTIES */
// Parent of the module. {String, Object} [selector, HTMLElement]
parent: document.body,
// Class name. {String}
className: '',
// Shape name. {String} [ 'circle' | 'rect' | 'polygon' | 'line' | 'cross' | 'equal' | 'curve' | 'zigzag' | '*custom defined name*' ]
shape: 'circle',
// ∆ :: Stroke color. {String} [color name, rgb, rgba, hex]
stroke: 'transparent',
// ∆ :: Stroke Opacity. {Number} [ 0..1 ]
strokeOpacity: 1,
// Stroke Line Cap. {String} ['butt' | 'round' | 'square']
strokeLinecap: '',
// ∆ :: Stroke Width. {Number} [ number ]
strokeWidth: 2,
// ∆ , Units :: Stroke Dash Array. {String, Number}
strokeDasharray: 0,
// ∆ , Units :: Stroke Dash Offset. {String, Number}
strokeDashoffset: 0,
// ∆ :: Fill Color. {String} [color name, rgb, rgba, hex]
fill: 'deeppink',
// ∆ :: Fill Opacity. {Number} [ 0..1 ]
fillOpacity: 1,
// ∆ , Units :: Left position of the module. {Number, String}
left: '50%',
// ∆ , Units :: Top position of the module. {Number, String}
top: '50%',
// ∆ , Units :: X shift. {Number, String}
x: 0,
// ∆ , Units :: Y shift. {Number, String}
y: 0,
// ∆ :: Angle. {Number, String}
rotate: 0,
// ∆ :: Scale of the module. {Number}
scale: 1,
// ∆ :: Explicit scaleX value (fallbacks to `scale`). {Number}
scaleX: null,
// ∆ :: Explicit scaleX value (fallbacks to `scale`). {Number}
scaleY: null,
// ∆ , Unit :: Origin for `x`, `y`, `scale`, `rotate` properties. {String}
origin: '50% 50%',
// ∆ :: Opacity. {Number} [ 0..1 ]
opacity: 1,
// ∆ :: X border radius. {Number, String}
rx: 0,
// ∆ :: Y border radius. {Number, String}
ry: 0,
// ∆ :: Points count ( for polygon, zigzag, equal ). {Number, String}
points: 3,
// ∆ :: Radius of the shape. {Number, String}
radius: 50,
// ∆ :: Radius X of the shape (fallbacks to `radius`). {Number, String}
radiusX: null,
// ∆ :: Radius Y of the shape (fallbacks to `radius`). {Number, String}
radiusY: null,
// If should hide module with `transforms` instead of `display`. {Boolean}
isSoftHide: true,
// If should trigger composite layer for the module. {Boolean}
isForce3d: false,
// If should be shown before animation starts. {Boolean}
isShowStart: false,
// If should stay shown after animation ends. {Boolean}
isShowEnd: true,
// If refresh state on subsequent plays. {Boolean}
isRefreshState: true,
// Context callbacks will be called with. {Object}
callbacksContext: this,
})
JavaScript
복사
Shape 생성하기
공식 문서를 차근차근 보면 쉽게 이해할 수 있다. 위에서 나온 prototype을 활용해서 원하는 형태의 모양을 만들 수 있다. mo.js의 장점은 원, 사각형, 직선 등 기본적인 shape들을 제공한다는 것이다. 아래 코드를 사용해서 빨간색 테두리의 원을 그려보자!
new mojs.Shape({
parent: '#circle',
shape: 'circle', // shape 'circle' is default
radius: 25, // shape radius
fill: 'transparent',// same as 'transparent'
stroke: '#F64040', // or 'cyan'
strokeWidth: 5, // width of the stroke
isShowStart: true, // show before any animation starts
});
JavaScript
복사
이제 아주 간단하게 animation을 만들어 볼 것이다. delta object를 활용하면 손쉽게 만들 수 있다.
new mojs.Shape({
parent: '#delta',
shape: 'circle',
scale: { 0 : 1 }, // 이렇게 object 형태로 넣어주면 된다.
duration: 1000,
delay: 1000,
easing: 'cubic.out',
repeat: 2
}).play(); // animation을 동작하게 하려면 play()를 적어준다.
// 이 외에도 다양한 메소드를 사용할 수 있다.
JavaScript
복사
신기한 부분은 object의 key, value 형태로 넣어준다는 것이다. 콤마를 활용해서 구분하는 것 보다 직관적으로 볼 수 있어서 활용한 것 같다. 만약 여러 값을 넣으면 마지막에 넣은 값으로 적용되는 것 같다.
Tweenable Interface
mo.js의 가장 핵심으로도 볼 수 있는 tweenable interface에 대해 간단히 알아보자. 위에서 나온 tween property와 tween callback을 활용해서 만드는 animation이다.
shape는 tween 객체를 포함하고 있어서 모든 shape에 대해서 적용할 수 있다. 위 shape interface에서 tweenable interface를 추가한 prototype을 살펴보자.
const shape = new mojs.Shape({
...
/* TWEEN PROPERTIES */
// Duration {Number}
duration: 350,
// Delay {Number}
delay: 0,
// If should repeat after animation finished {Number} *(1)
repeat: 0,
// Speed of the tween {Number}[0..∞]
speed: 1,
// If the progress should be flipped on repeat animation end {Boolean}
isYoyo: false,
// Easing function {String, Function}[ easing name, path coordinates, bezier string, easing function ]
easing: 'sin.out',
// Easing function for backward direction of the tween animation (fallbacks to `easing`) {String, Function}[ easing name, path coordinates, bezier string, easing function ]
backwardEasing: null,
/* TWEEN CALLBACKS */
/*
Fires on every update of the tween in any period (including delay periods). You probably want to use `onUpdate` method instead.
@param p {Number} Normal (not eased) progress.
@param isForward {Boolean} Direction of the progress.
@param isYoyo {Boolean} If in `yoyo` period.
*/
onProgress (p, isForward, isYoyo) {},
/*
Fires when tween's the entire progress reaches `0` point(doesn't fire in repeat periods).
@param isForward {Boolean} If progress moves in forward direction.
@param isYoyo {Boolean} If progress inside `yoyo` flip period.
*/
onStart (isForward, isYoyo) {},
/*
Fires when tween's the progress reaches `0` point in normal or repeat period.
@param isForward {Boolean} If progress moves in forward direction.
@param isYoyo {Boolean} If progress inside `yoyo` flip period.
*/
onFirstUpdate (isForward, isYoyo) {},
/*
Fires on first update of the tween in sufficiently active period (excluding delay periods).
@param ep {Number} Eased progress.
@param p {Number} Normal (not eased) progress.
@param isForward {Boolean} Direction of the progress.
@param isYoyo {Boolean} If in `yoyo` period.
*/
onUpdate (ep, p, isForward, isYoyo) {},
/*
Fires when tween's the progress reaches `1` point in normal or repeat period.
@param isForward {Boolean} If progress moves in forward direction.
@param isYoyo {Boolean} If progress inside `yoyo` flip period.
*/
onRepeatComplete (isForward, isYoyo) {},
/*
Fires when tween's the entire progress reaches `1` point(doesn't fire in repeat periods).
@param isForward {Boolean} If progress moves in forward direction.
@param isYoyo {Boolean} If progress inside `yoyo` flip period.
*/
onComplete (isForward, isYoyo) {},
/* Fires when the `.play` method called and tween isn't in play state yet. */
onPlaybackStart () {},
/* Fires when the `.pause` method called and tween isn't in pause state yet. */
onPlaybackPause () {},
/* Fires when the `.stop` method called and tween isn't in stop state yet. */
onPlaybackStop () {},
/* Fires when the tween end's animation (regardless progress) */
onPlaybackComplete () {},
})
/*
Creates next state transition chain.
@param options {Object} Next shape state.
*/
.then({ /* next state options */ })
/*
Tunes start state with new options.
@param options {Object} New start properties.
*/
.tune({ /* new start properties */ })
/*
Regenerates all randoms in initial properties.
*/
.generate()
/*
Starts playback.
@param shift {Number} Start progress shift in milliseconds.
*/
.play( shift = 0 )
/*
Starts playback in backward direction.
@param shift {Number} Start progress shift in milliseconds.
*/
.playBackward( shift = 0 )
/*
Pauses playback.
*/
.pause()
/*
Restarts playback.
@param shift {Number} Start progress shift in milliseconds.
*/
.replay( shift = 0 )
/*
Restarts playback in backward direction.
@param shift {Number} Start progress shift in milliseconds.
*/
.replayBackward( shift = 0 )
/*
Resumes playback in direction it was prior to `pause`.
@param shift {Number} Start progress shift in milliseconds.
*/
.resume( shift = 0 )
/*
Sets progress of the tween.
@param progress {Number} Progress to set [ 0..1 ].
*/
.setProgress( progress )
/*
Sets speed of the tween.
@param speed {Number} Progress to set [ 0..∞ ].
*/
.setSpeed ( speed )
/* Stops and resets the tween. */
.reset ( speed )
JavaScript
복사
이렇게 만든 여러개의 shape들을 timeline을 활용해 동시에 조작할 수 있다. 아래처럼 timeline을 만들어 동시에 관리하고 싶은 shape들을 등록할 수 있다.
const timeline = new mojs.Timeline;
timeline
.add( rect, circle, triangle, polygon, triangle2, polygon2, circle2 );
JavaScript
복사
SVG를 활용한 custom shape
mo.js도 svg를 활용해서 custom shape를 만들 수 있느데 방법이 아주 간단하다. 원하는 이름의 class를 만든뒤, mojs.addShape()를 사용해주면 된다.
class Bubble extends mojs.CustomShape {
getShape () { return '<path d="M83.0657721,87.5048737 C74.252469,95.2810178 62.6770192,99.9991713 49.9995857,99.9991713 C22.385577,99.9991713 0,77.6135943 0,49.9995857 C0,22.385577 22.385577,0 49.9995857,0 C77.6135943,0 99.9991713,22.385577 99.9991713,49.9995857 C99.9991713,50.0248803 99.9991526,50.0501705 99.999115,50.0754564 L100,94.5453117 C100,99.9979302 96.8685022,101.290527 93.0045119,97.4313174 L83.0657721,87.5048737 Z"></path>'; }
getLength () { return 200; } // optional
}
mojs.addShape( 'bubble', Bubble ); // passing name and Bubble class
// now it is avaliable on mojs.Shape constructor as usual
new mojs.Shape({ shape: 'bubble' });
JavaScript
복사
서비스에 적용해보기
이제 이때까지 배운 기능들을 활용해 역동적인 하트 애니메이션을 만들어볼 예정이다.
then을 활용해 다음 상태 만들어주기
애니메이션으로 특정 상태를 보여주고 난 후, 다시 사라지는 애니메이션을 적용하고 싶을 때, then을 활용해 주면 된다.
new mojs.Shape({
parent: '#then',
shape: 'rect',
fill: 'none',
stroke: '#FC46AD',
radius: 10,
strokeWidth: 20,
rotate: { [-180] : 0 },
duration: 600
}).then({
strokeWidth: 0,
scale: { to: 2, easing: 'sin.in' },
});
JavaScript
복사
then을 작성할 때에는 기존에 정의된 값을 한번 더 적을 필요가 없다. 아래와 같이 stroke도 delta값으로 활용할 수 있다.
new mojs.Shape({
parent: '#newdeltainthen',
shape: 'rect',
fill: 'none',
stroke: 'cyan',
radius: 10,
strokeWidth: 20,
rotate: { [-180] : 0 },
duration: 600
}).then({
strokeWidth: { 50 : 0 },
stroke: { 'magenta' : 'yellow' }
});
JavaScript
복사
parent 지정 필요
애니메이션을 항상 화면의 가운데, 모든 element들 중 가장 앞에 보이도록 하기 위해서 따로 위치 지정을 해야 했다. 아래와 같이 원하는 위치에 빈 element를 하나 생성한다.
<body>
<div id="center-of-viewport" style="position: fixed; left: 50%; top: 50%; z-index: 100;"/>
...
</body>
HTML
복사
이후 적용할 Shape의 parent property에 해당 html element를 넣어주면 된다.
const shape = new mojs.Shape({
parent: document.querySelector("#center-of-viewport");
...
});
JavaScript
복사
timeline을 활용해 애니메이션 묶어주기
만들어둔 shape들을 묶어서 원하는 시점에 play()해주면 끝!
const timeline = new mojs.Timeline({ delay: 0 });
heartButton.addEventListener('click', () => {
timeline
.add(purpleHeart, redHeart, yellowHeart, blueCircle, finalHeart)
.play();
}
JavaScript
복사
