궁금한 내용, 오타, 수정사항, 문의사항은 아래 깃허브 이슈 혹은 노션 블록 댓글로 달아주시면 바로 확인해드립니다! 도움이 되셨다면 아래 링크를 통해  한번 꾹 눌러주세요
9. Hard Shadow
이번 장에서는 hard shadow를 구현한다.
9.1. 실습목표
object와 light 사이에 또 다른 object가 존재할 때에 그림자가 발생하는데 이 그림자를 구현할 수 있다.
9.2. shadow
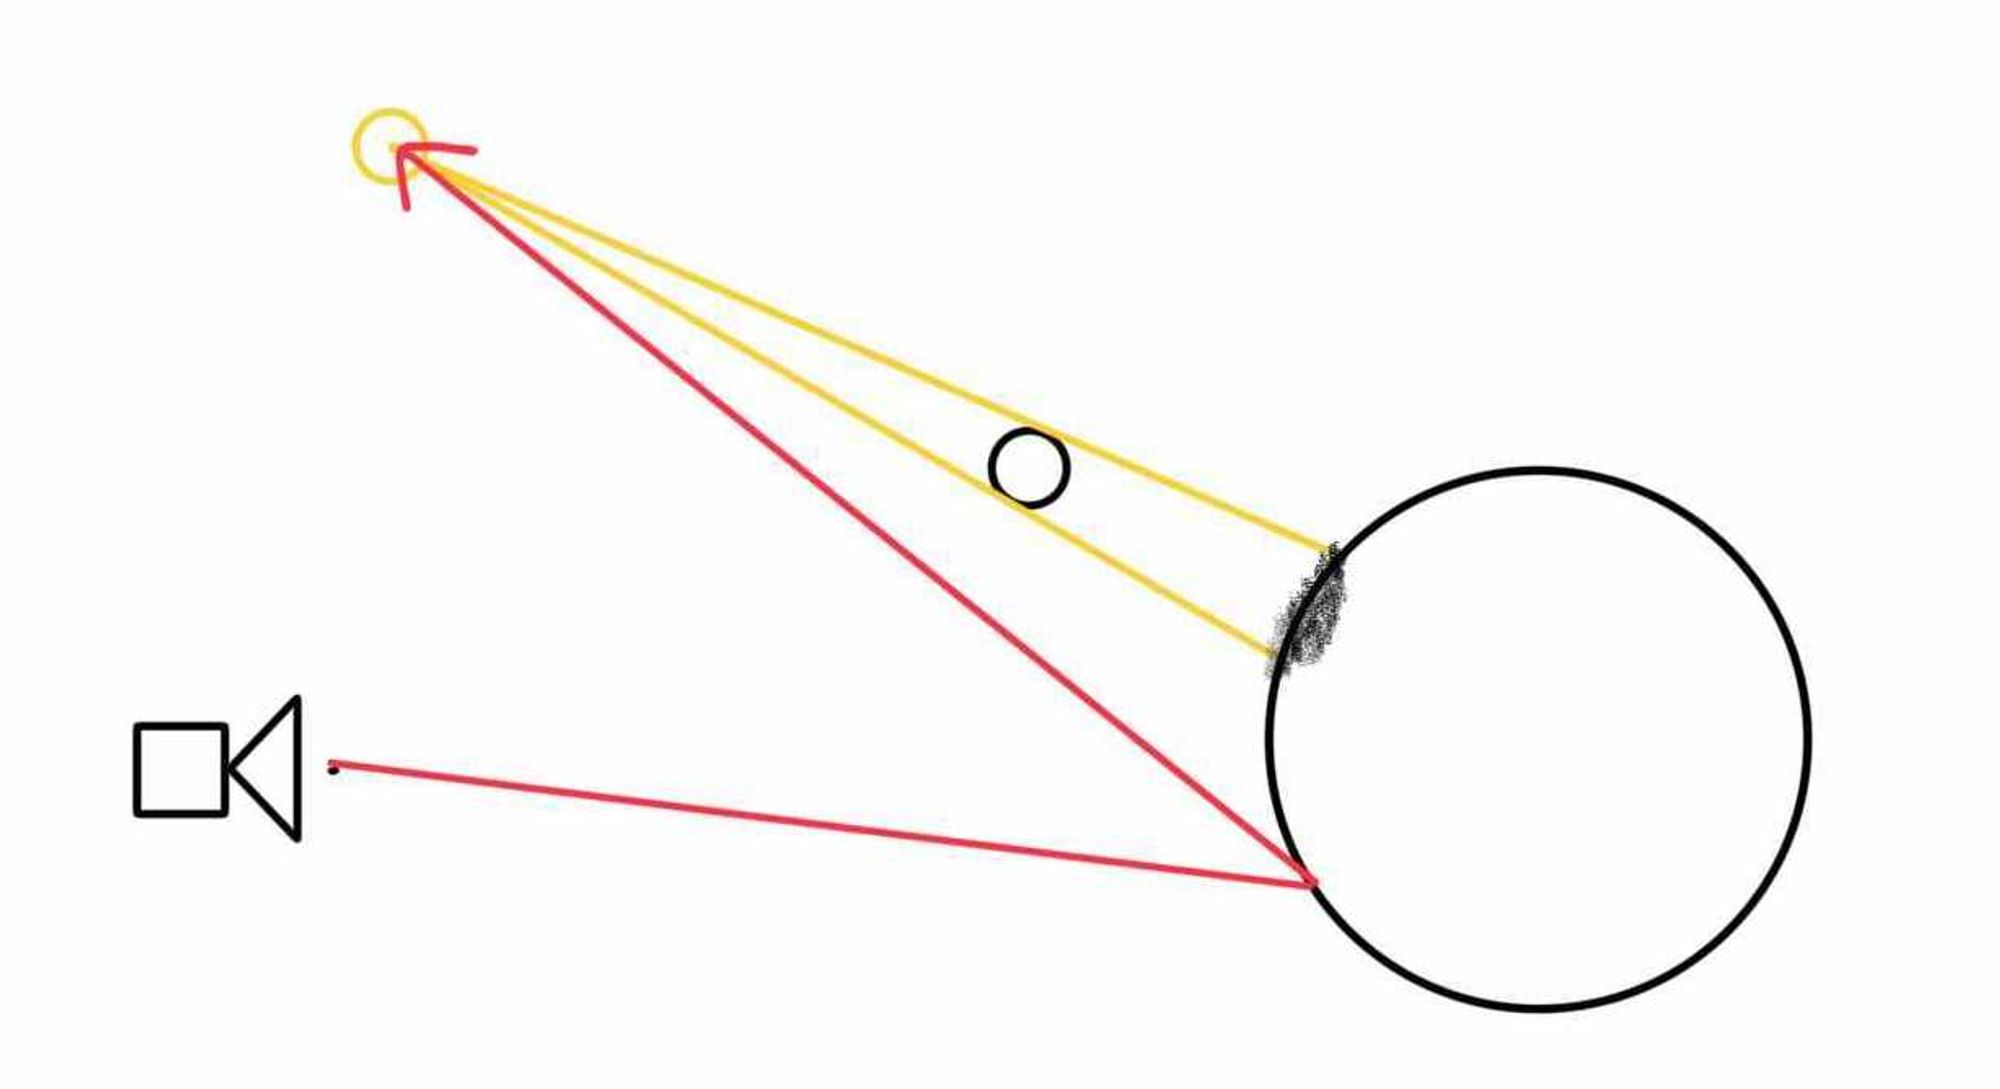
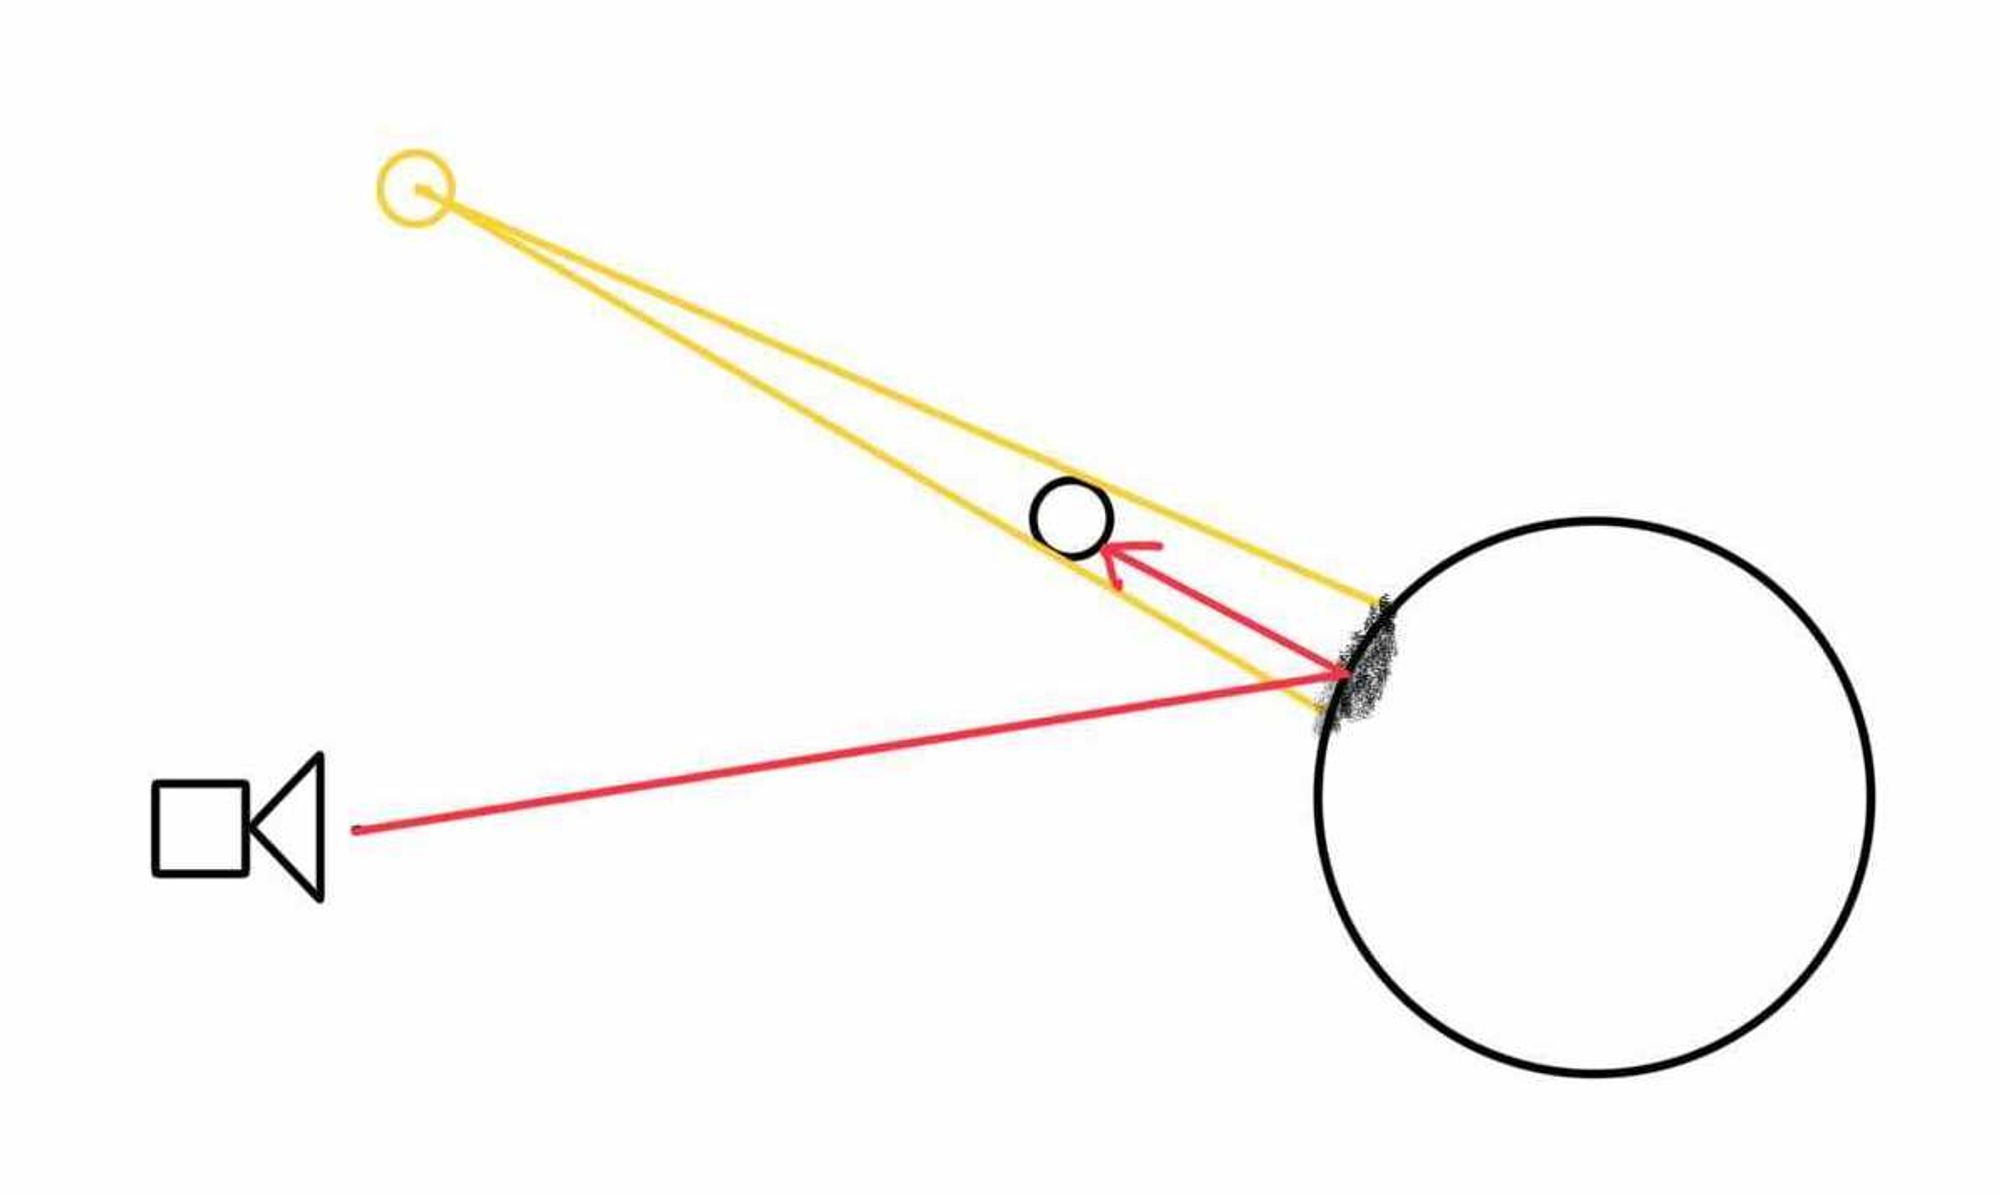
8단원에서는 phong lighting model을 적용하여 빛을 구현했다. 하지만 빛이 있으면 반대로 그림자도 존재하는 법. hit point와 광원 사이를 가로막는 object가 있으면 그림자를 적용할 것이다. 실제 현실에서의 그림자는 soft shadow지만 우리는 hard shadow를 구현할 것이다.
이미지1. not_in_shadow
이미지2. in_shadow
그럼 먼저 in_shadow라는 함수를 만들어 보자.
t_bool in_shadow(t_object *objs, t_ray light_ray, double light_len)
{
t_hit_record rec;
rec.tmin = 0;
rec.tmax = light_len;
if (hit(objs, &light_ray, &rec))
return (TRUE);
return (FALSE);
}
C
복사
Code1 : [miniRT/src/trace/ray/phong_lighting.c]
hit_point에서 부터 광원의 원점을 향해 ray를 쏴준다. 이를 light_ray라 한다. light_ray 가 object에 가로막히게 되면 hit_point가 그림자 안에 존재하는 것이다. rec.tmax는 hit point로 부터 광원의 원점까지의 거리 light_len 이어야 한다. rec.tmax를 light_len 보다 길게 잡을 경우 광원 뒤에 다른 오브젝트가 있을 때조차 shadow가 생기는 기현상이 발생할 수 있기 때문이다.
9.3. shadow 적용
이제 in_shadow함수를 만들었으니 이를 다른 함수에 적용시켜보자.
...
t_color3 point_light_get(t_scene *scene, t_light *light)
{
t_color3 ambient;
t_color3 diffuse;
t_color3 specular;
t_vec3 light_dir;
// 추가
double light_len;
t_ray light_ray;
// 추가 끝
t_vec3 view_dir;
t_vec3 reflect_dir;
...
double spec;
double brightness;
// 추가
light_dir = vminus(light->origin, scene->rec.p);
light_len = vlength(light_dir);
light_ray = ray(vplus(scene->rec.p, vmult(scene->rec.normal, EPSILON)), light_dir);
if (in_shadow(scene->world, light_ray, light_len))
return (color3(0,0,0));
light_dir = vunit(light_dir);
// 추가 끝
view_dir = vunit(vmult(scene->ray.dir, -1));
// 제거
light_dir = vunit(vminus(light->origin, scene->rec.p));
// 제거 끝
...
C
복사
Code2 : [miniRT/src/trace/ray/phong_lighting.c]
in_shadow 함수를 trace.h헤더에 추가한다.
t_color3 point_light_get(t_scene *scene, t_light *light);
// 추가
t_bool in_shadow(t_object *objs, t_ray light_ray, double light_len);
// 추가 끝
// trace/hit/
t_bool hit(t_object *obj, t_ray *ray, t_hit_record *rec);
C
복사
Code3 : [miniRT/include/trace.h]
이번 단원에서 구현한 shadow를 확인하기 위해 scene_init 함수를 수정하자.
scene->camera = camera(&scene->canvas, point3(0, 0, 0));
world = object(SP, sphere(point3(-2, 0, -5), 2), color3(0.5, 0, 0)); // world 에 구1 추가
// 추가
oadd(&world, object(SP, sphere(point3(0, -1000, 0), 995), color3(1, 1, 1))); // world 에 구3 추가
// 추가 끝
oadd(&world, object(SP, sphere(point3(2, 0, -5), 2), color3(0, 0.5, 0))); // world 에 구2 추가
scene->world = world;
// 추가
lights = object(LIGHT_POINT, light_point(point3(0, 20, 0), color3(1, 1, 1), 0.5), color3(0, 0, 0)); // 더미 albedo
// 추가 끝
scene->light = lights;
return (scene);
C
복사
Code4 : [miniRT/src/main.c]
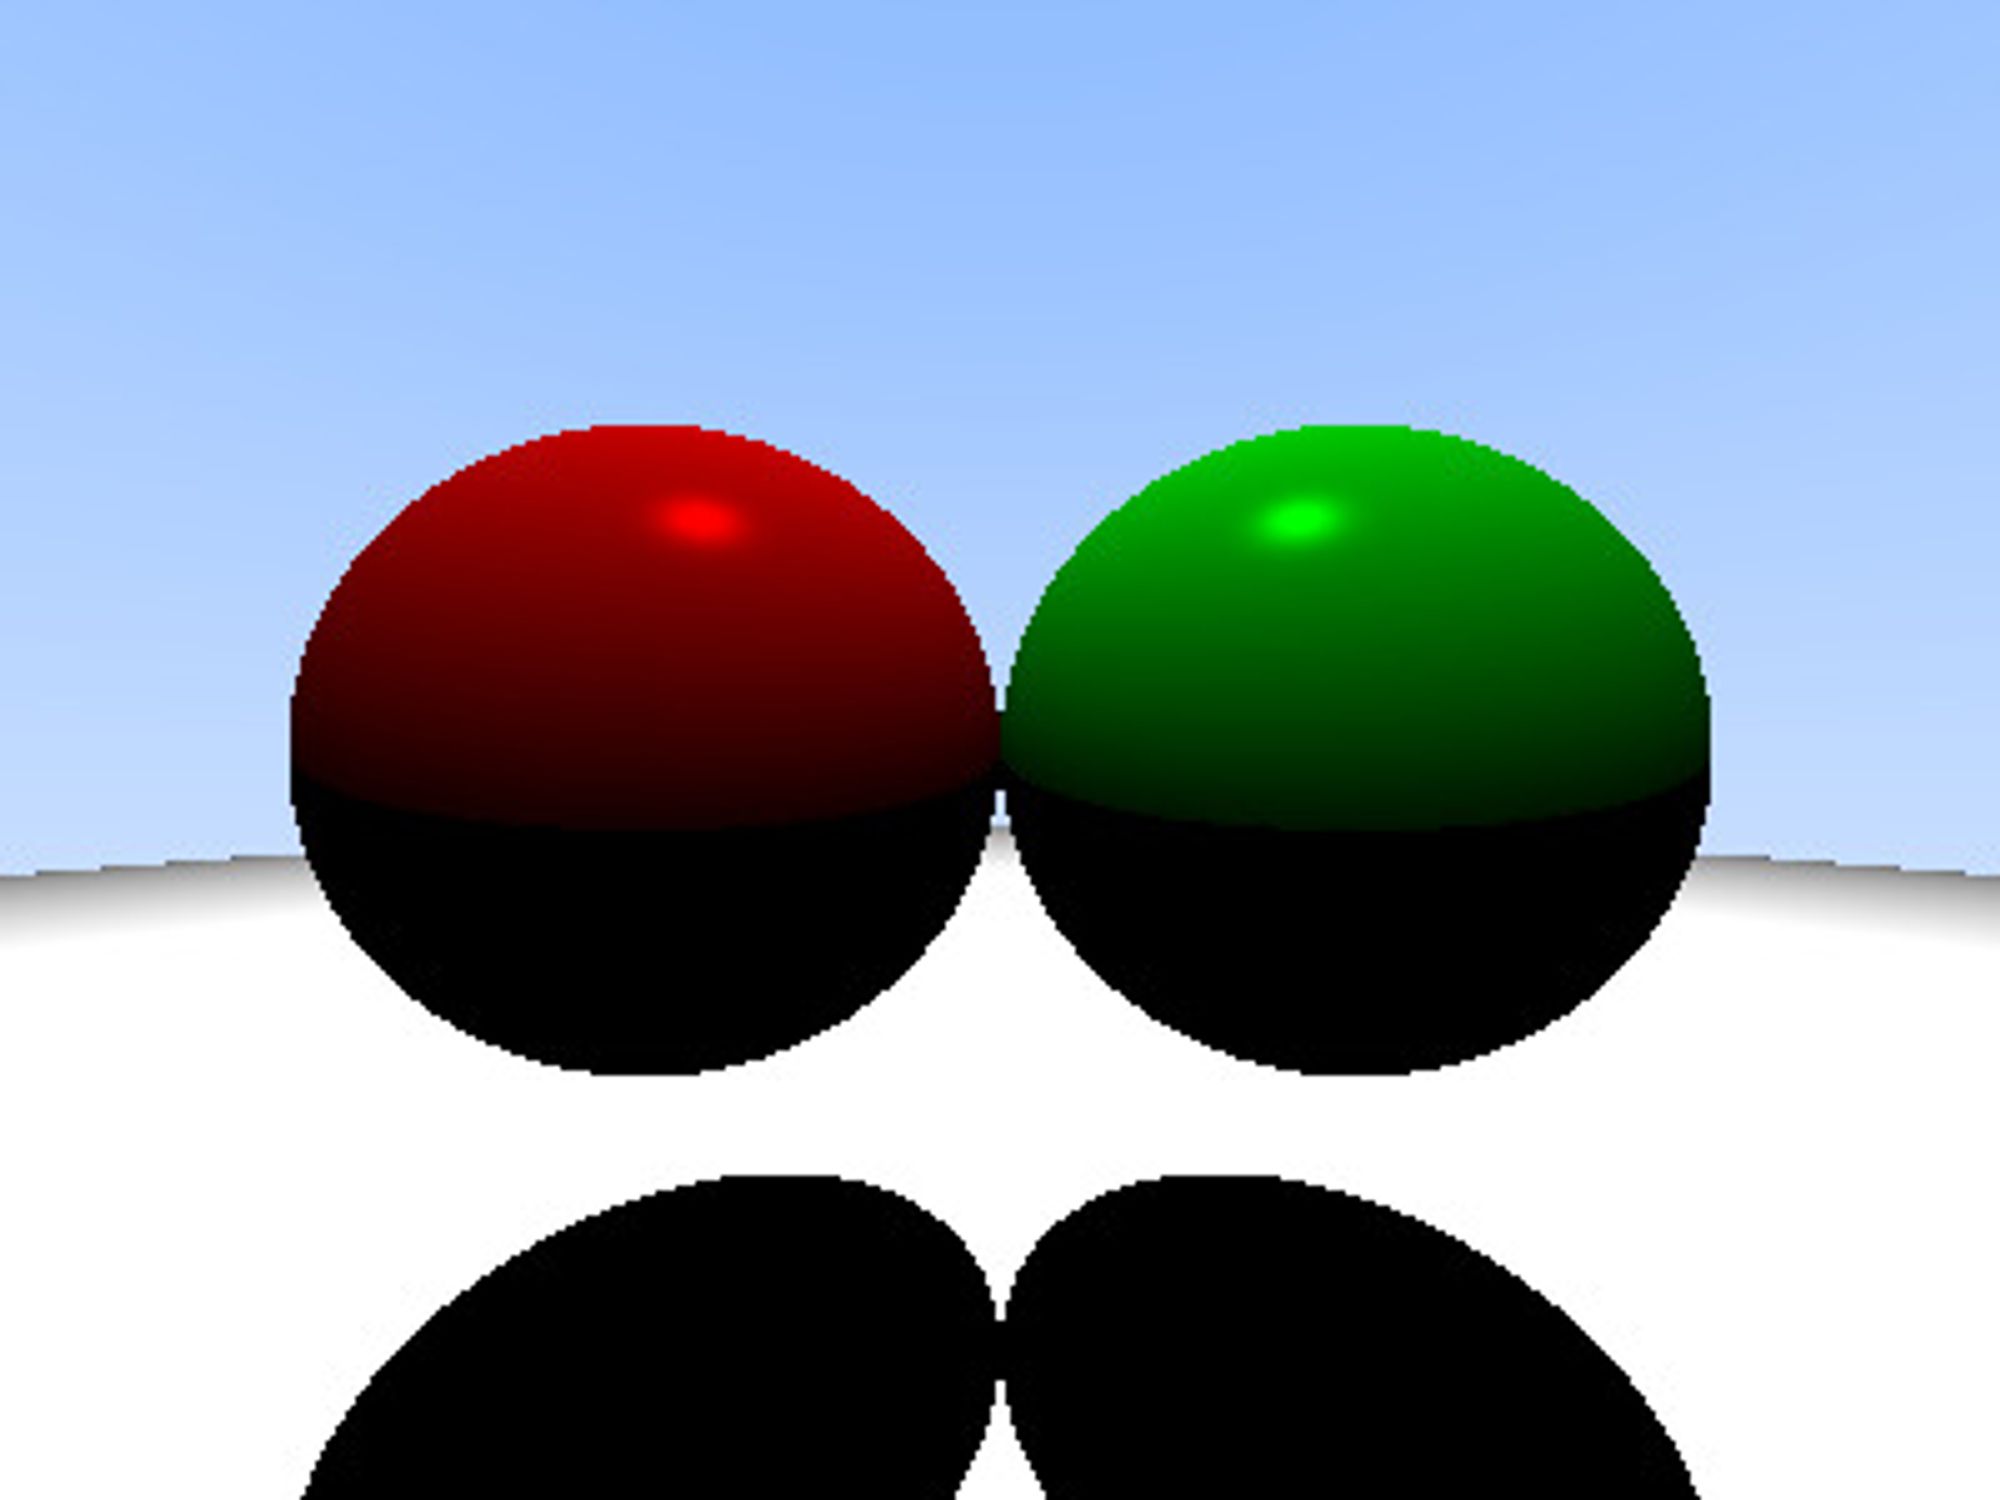
이번 단원의 결과물은 다음과 같다.
이미지3. 그림자 적용한 결과


